Adding objects to the map
Basic principles
In high level you deal with two key concepts in Nutiteq SDK API.
- The map view object MapView provides methods for directly manipulating the view.
- The layers object is called Layers and it provides methods for adding data to the map. It's accessible trough the map view object.
- Layers are created with specific DataSource which defines from where the data is taken, typically it is from memory, a persistent file or on-line API.
- The options object is called Options and it provides methods for tweaking the map parameters. It's accessible trough the map view object.
Adding objects to the map
Data is added to the map as Layers, the concept which is familiar to GIS users. The usual approach is to add one TileLayer as a background; e.g. Nutiteq Vector Map with OpenStreetMap data, as given in Getting Started Guide. Then you add one or several interactive VectorLayers on top of it (with Markers, Texts, Popups etc).
Each map layer is required to have a DataSource, which defines from where and how the layer retrieves data. Several common data source implementations are built into Nutiteq SDK, but you can define also own specific data sources. For example HTTPRasterTileDataSource is used for retrieving map tiles as images over HTTP connection and LocalVectorDataSource keeps data in memory and is used for adding per user session vector objects to the map.
In following examples we show vector elements: Markers, Points, Lines, Polygons, Texts and BalloonPopups on the map. For each we define styling, create objects to given coordinates and add them to a memory-based vector data source LocalVectorDataSource. First of all we create a VectorLayer with the data source, and add the Layer to the map.
Note that just adding vector element to map layer does not define or open automatically any popup labels. This is different from older Nutiteq SDK 2. Popup is now a map object of its own, and should be added using object click listener.
1. Add a Marker
There are no built-in marker bitmaps in Nutiteq SDK, so first you must add an image marker.png to your application project. This is used as key Marker style element.
  // this was initialized before
  NTEPSG3857* proj = [[NTEPSG3857 alloc] init];

  // 1. Initialize a local vector data source
  NTLocalVectorDataSource* vectorDataSource1 = [[NTLocalVectorDataSource alloc] initWithProjection:proj];

  // 2. Initialize a vector layer with the previous data source
  NTVectorLayer* vectorLayer1 = [[NTVectorLayer alloc] initWithDataSource:vectorDataSource1];

  // 3. Add the previous vector layer to the map
  [[self getLayers] add:vectorLayer1];

  // 4. Set visible zoom range for the vector layer
  [vectorLayer1 setVisibleZoomRange:[[NTMapRange alloc] initWithMin:10 max:24]];

  // 5. Load bitmaps for custom markers
  UIImage* markerImage = [UIImage imageNamed:@"marker.png"];
  NTBitmap* markerBitmap = [NTBitmapUtils createBitmapFromUIImage: markerImage];

  // 6. Create a marker style
  NTMarkerStyleBuilder* markerStyleBuilder = [[NTMarkerStyleBuilder alloc] init];
  [markerStyleBuilder setBitmap:markerBitmap];
    // Styles use dpi-independent units, no need to adjust it for retina
  [markerStyleBuilder setSize:30];
  NTMarkerStyle* sharedMarkerStyle = [markerStyleBuilder buildStyle];

  // 7. Define position and metadata for marker. Two important notes:
    // (1) Position in latitude/longitude has to be converted using projection
    // (2) X is longitude, Y is latitude, NOT like in many other APIs !
  NTMapPos* pos = [proj fromWgs84:[[NTMapPos alloc] initWithX:24.651488 y:59.423581]];
  NTMarker* marker1 = [[NTMarker alloc] initWithPos:pos style:sharedMarkerStyle];

  // Defined metadata will be used later for Popups
  [marker1 setMetaDataElement:@"ClickText" element:@"Marker 1"];
  [vectorDataSource1 add:marker1];
Projection proj = mapView.getOptions().getBaseProjection();

// Initialize an local vector data source
LocalVectorDataSource vectorDataSource1 = new LocalVectorDataSource(proj);

// Initialize a vector layer with the previous data source
VectorLayer vectorLayer1 = new VectorLayer(vectorDataSource1);

// Add the previous vector layer to the map
mapView.getLayers().add(vectorLayer1);

// Set limited visible zoom range for the vector layer
vectorLayer1.setVisibleZoomRange(new MapRange(10, 24));

// Load bitmaps for custom markers
Bitmap androidMarkerBitmap = BitmapFactory.decodeResource(getResources(), R.drawable.marker);
com.nutiteq.graphics.Bitmap markerBitmap = BitmapUtils.createBitmapFromAndroidBitmap(androidMarkerBitmap);

// Create marker style
MarkerStyleBuilder markerStyleBuilder = new MarkerStyleBuilder();
markerStyleBuilder.setBitmap(markerBitmap);

//markerStyleBuilder.setHideIfOverlapped(false);
markerStyleBuilder.setSize(30);
MarkerStyle sharedMarkerStyle = markerStyleBuilder.buildStyle();

// Add marker
Marker marker1 = new Marker(proj.fromWgs84(new MapPos(24.646469, 59.426939)), sharedMarkerStyle);
marker1.setMetaDataElement("ClickText", "Marker nr 1");
vectorDataSource1.add(marker1);
// Load bitmaps for markers
UnsignedCharVector iconBytes = AssetUtils.LoadBytes("Icon.png");
var markerBitmap = new Bitmap (iconBytes, true);

// Create marker style
MarkerStyleBuilder markerStyleBuilder = new MarkerStyleBuilder();
markerStyleBuilder.Bitmap = markerBitmap;

//markerStyleBuilder.setHideIfOverlapped(false);
markerStyleBuilder.Size = 30;
MarkerStyle sharedMarkerStyle = markerStyleBuilder.BuildStyle();

// Add marker
Marker marker1 = new Marker(proj.FromWgs84(new MapPos(24.646469, 59.426939)), sharedMarkerStyle);
marker1.SetMetaDataElement("ClickText", "Marker nr 1");
vectorDataSource1.Add(marker1);

2. Add a Point
Points are marking specific location points, just as Markers. Key difference is that Point does not have overlapping control and cannot be with billboard style in 2.5D. So if you have a lot of data (thousands of points) and do not use 2.5D views, then using Points is suggested, as it can be significantly faster.
You can add any type of vector objects to same Layer and UnculledVectorDataSource, so we reuse same as defined for Marker. You should define different Layers and DataSources for specific reasons:
- to delete all objects of data source at once
- specify drawing order. Drawing order within one Layer is undefined, but Layers which are added before are always drawed below next Layers.
    // 1. Create style and position for the Point
    NTPointStyleBuilder* pointStyleBuilder = [[NTPointStyleBuilder alloc] init];

     //color is defined as ARGB integer, i.e. following is opaque green
     //you can not use UIColor (or any other ObjectiveC specific class) in Nutiteq
    [pointStyleBuilder setColor:[[NTColor alloc] initWithColor:0xFF00FF00]];
    [pointStyleBuilder setSize:16];
    NTMapPos* pos = [proj fromWgs84:[[NTMapPos alloc] initWithX:24.651488 y:59.423581]];

    // 2. Create Point, add to datasource with metadata
    NTPoint* point1 = [[NTPoint alloc] initWithPos:pos style:[pointStyleBuilder buildStyle]];
    [point1 setMetaDataElement:@"ClickText" element:@"Point 1"];
    [vectorDataSource1 add:point1];
PointStyleBuilder pointStyleBuilder = new PointStyleBuilder();
pointStyleBuilder.setColor(new Color(0xFF00FF00));
pointStyleBuilder.setSize(16);

Point point1 = new Point(proj.fromWgs84(new MapPos(24.651488, 59.423581)), pointStyleBuilder.buildStyle());
point1.setMetaDataElement("ClickText", "Point nr 1");

vectorDataSource1.add(point1);
var pointStyleBuilder = new PointStyleBuilder();
pointStyleBuilder.Color = new Color(0, 255, 0, 255);
pointStyleBuilder.Size = 16;

Point point1 = new Point(proj.FromWgs84(new MapPos(24.651488, 59.423581)), pointStyleBuilder.BuildStyle());
point1.SetMetaDataElement("ClickText", "Point nr 1");

vectorDataSource1.Add(point1);
3. Add a Line
Line can be added to the same vectorDataSource1:
    // 1. Define line style
    NTLineStyleBuilder* lineStyleBuilder = [[NTLineStyleBuilder alloc] init];
    // White color, opaque
    [lineStyleBuilder setColor:[[NTColor alloc] initWithColor:0xFFFFFFFF]];
    [lineStyleBuilder setLineJointType:NT_LINE_JOINT_TYPE_ROUND];
    [lineStyleBuilder setWidth:8];

    // 2. Define line positions, here as fixed locations
    MapPosVector* linePoses = [[MapPosVector alloc] init];
    [linePoses add:[proj fromWgs84:[[NTMapPos alloc] initWithX:24.645565 y:59.422074]]];
    [linePoses add:[proj fromWgs84:[[NTMapPos alloc] initWithX:24.643076 y:59.420502]]];
    [linePoses add:[proj fromWgs84:[[NTMapPos alloc] initWithX:24.645351 y:59.419149]]];
    [linePoses add:[proj fromWgs84:[[NTMapPos alloc] initWithX:24.648956 y:59.420393]]];
    [linePoses add:[proj fromWgs84:[[NTMapPos alloc] initWithX:24.650887 y:59.422707]]];

    // 3. Create line, add metadata and add to the datasource
    NTLine* line1 = [[NTLine alloc] initWithGeometry:[[NTLineGeometry alloc] initWithPoses:linePoses] style:[lineStyleBuilder buildStyle]];
    [line1 setMetaDataElement:@"ClickText" element:@"Line 1"];
    [vectorDataSource1 add:line1];
// Create line style, and line poses
LineStyleBuilder lineStyleBuilder = new LineStyleBuilder();
lineStyleBuilder.setColor(new Color(0xFFFFFFFF));
lineStyleBuilder.setLineJointType(LineJointType.LINE_JOINT_TYPE_ROUND);
lineStyleBuilder.setStretchFactor(2);
lineStyleBuilder.setWidth(8);

// Special MapPosVector must be used for coordinates
MapPosVector linePoses = new MapPosVector();
linePoses.add(proj.fromWgs84(new MapPos(24.645565, 59.422074)));
linePoses.add(proj.fromWgs84(new MapPos(24.643076, 59.420502)));
linePoses.add(proj.fromWgs84(new MapPos(24.645351, 59.419149)));
linePoses.add(proj.fromWgs84(new MapPos(24.648956, 59.420393)));
linePoses.add(proj.fromWgs84(new MapPos(24.650887, 59.422707)));

// Add a line
Line line1 = new Line(linePoses, lineStyleBuilder.buildStyle());
line1.setMetaDataElement("ClickText", "Line nr 1");
vectorDataSource2.add(line1);
// Create line style, and line poses
var lineStyleBuilder = new LineStyleBuilder();
lineStyleBuilder.LineJointType = LineJointType.LineJointTypeRound;
lineStyleBuilder.Width = 8;

var linePoses = new MapPosVector ();
linePoses.Add(proj.FromWgs84(new MapPos(0, 0)));
linePoses.Add(proj.FromWgs84(new MapPos(0, 80)));
linePoses.Add(proj.FromWgs84(new MapPos(45, 45)));

var line = new Line (linePoses, lineStyleBuilder.BuildStyle ());
dataSource.Add (line);

4. Add a Polygon
Following defines and adds a polygon with a hole
    // 1. Create polygon style
    NTPolygonStyleBuilder* polygonStyleBuilder = [[NTPolygonStyleBuilder alloc] init];
     // polygon fill color: opaque red
    [polygonStyleBuilder setColor:[[NTColor alloc] initWithColor:0xFFFF0000]];
     // define polygon outline style as line style
    lineStyleBuilder = [[NTLineStyleBuilder alloc] init];
     // opaque black color
    [lineStyleBuilder setColor:[[NTColor alloc] initWithColor:0xFF000000]];
    [lineStyleBuilder setWidth:1.0f];
    [polygonStyleBuilder setLineStyle:[lineStyleBuilder buildStyle]];

    // 2. define polygon coordinates
     // First define outline as MapPosVector, which is array of MapPos
     // We cannot use Objective C objects, like NSArray in Nutiteq SDK,
     // so there are special objects for collections
    MapPosVector* polygonPoses = [[MapPosVector alloc] init];
    [polygonPoses add:[proj fromWgs84:[[NTMapPos alloc] initWithX:24.650930 y:59.421659]]];
    [polygonPoses add:[proj fromWgs84:[[NTMapPos alloc] initWithX:24.657453 y:59.416354]]];
    [polygonPoses add:[proj fromWgs84:[[NTMapPos alloc] initWithX:24.661187 y:59.414607]]];
    [polygonPoses add:[proj fromWgs84:[[NTMapPos alloc] initWithX:24.667667 y:59.418123]]];
    [polygonPoses add:[proj fromWgs84:[[NTMapPos alloc] initWithX:24.665736 y:59.421703]]];
    [polygonPoses add:[proj fromWgs84:[[NTMapPos alloc] initWithX:24.661444 y:59.421245]]];
    [polygonPoses add:[proj fromWgs84:[[NTMapPos alloc] initWithX:24.660199 y:59.420677]]];
    [polygonPoses add:[proj fromWgs84:[[NTMapPos alloc] initWithX:24.656552 y:59.420175]]];
    [polygonPoses add:[proj fromWgs84:[[NTMapPos alloc] initWithX:24.654010 y:59.421472]]];

      // Define polygon holes. This is two-dimensional array (MapPosVectorVector)
      // because Polygon can have several holes. In this sample there are two
    MapPosVectorVector* holes = [[MapPosVectorVector alloc] init];
    [holes add:[[MapPosVector alloc] init]];
    [[holes get:0] add:[proj fromWgs84:[[NTMapPos alloc] initWithX:24.658409 y:59.420522]]];
    [[holes get:0] add:[proj fromWgs84:[[NTMapPos alloc] initWithX:24.662207 y:59.418896]]];
    [[holes get:0] add:[proj fromWgs84:[[NTMapPos alloc] initWithX:24.662207 y:59.417411]]];
    [[holes get:0] add:[proj fromWgs84:[[NTMapPos alloc] initWithX:24.659524 y:59.417171]]];
    [[holes get:0] add:[proj fromWgs84:[[NTMapPos alloc] initWithX:24.657615 y:59.419834]]];
    [holes add:[[MapPosVector alloc] init]];
    [[holes get:1] add:[proj fromWgs84:[[NTMapPos alloc] initWithX:24.665640 y:59.421243]]];
    [[holes get:1] add:[proj fromWgs84:[[NTMapPos alloc] initWithX:24.668923 y:59.419463]]];
    [[holes get:1] add:[proj fromWgs84:[[NTMapPos alloc] initWithX:24.662893 y:59.419365]]];

    // 3. Create polygon, define metadata and add to datasource
    NTPolygon* polygon = [[NTPolygon alloc] initWithGeometry:[[NTPolygonGeometry alloc] initWithPoses:polygonPoses holes:holes] style:[polygonStyleBuilder buildStyle]];
    [polygon setMetaDataElement:@"ClickText" element:@"Polygon"];
    [vectorDataSource1 add:polygon];
// Create polygon style and poses
PolygonStyleBuilder polygonStyleBuilder = new PolygonStyleBuilder();
polygonStyleBuilder.setColor(new Color(0xFFFF0000));
lineStyleBuilder = new LineStyleBuilder();
lineStyleBuilder.setColor(new Color(0xFF000000));
lineStyleBuilder.setWidth(1.0f);
polygonStyleBuilder.setLineStyle(lineStyleBuilder.buildStyle());

// Define coordinates of outer ring
MapPosVector polygonPoses = new MapPosVector();
polygonPoses.add(proj.fromWgs84(new MapPos(24.650930, 59.421659)));
polygonPoses.add(proj.fromWgs84(new MapPos(24.657453, 59.416354)));
polygonPoses.add(proj.fromWgs84(new MapPos(24.661187, 59.414607)));
polygonPoses.add(proj.fromWgs84(new MapPos(24.667667, 59.418123)));
polygonPoses.add(proj.fromWgs84(new MapPos(24.665736, 59.421703)));
polygonPoses.add(proj.fromWgs84(new MapPos(24.661444, 59.421245)));
polygonPoses.add(proj.fromWgs84(new MapPos(24.660199, 59.420677)));
polygonPoses.add(proj.fromWgs84(new MapPos(24.656552, 59.420175)));
polygonPoses.add(proj.fromWgs84(new MapPos(24.654010, 59.421472)));

// Create polygon holes poses, note that special MapPosVectorVector must be used
MapPosVectorVector polygonHoles = new MapPosVectorVector();
polygonHoles.add(new MapPosVector());
polygonHoles.get(0).add(proj.fromWgs84(new MapPos(24.658409, 59.420522)));
polygonHoles.get(0).add(proj.fromWgs84(new MapPos(24.662207, 59.418896)));
polygonHoles.get(0).add(proj.fromWgs84(new MapPos(24.662207, 59.417411)));
polygonHoles.get(0).add(proj.fromWgs84(new MapPos(24.659524, 59.417171)));
polygonHoles.get(0).add(proj.fromWgs84(new MapPos(24.657615, 59.419834)));
polygonHoles.add(new MapPosVector());
polygonHoles.get(1).add(proj.fromWgs84(new MapPos(24.665640, 59.421243)));
polygonHoles.get(1).add(proj.fromWgs84(new MapPos(24.668923, 59.419463)));
polygonHoles.get(1).add(proj.fromWgs84(new MapPos(24.662893, 59.419365)));

// Add polygon
Polygon polygon = new Polygon(polygonPoses, polygonHoles, polygonStyleBuilder.buildStyle());
polygon.setMetaDataElement("ClickText", "Polygon");
vectorDataSource1.add(polygon);
// Create polygon style and poses
PolygonStyleBuilder polygonStyleBuilder = new PolygonStyleBuilder();
polygonStyleBuilder.Color = new Color(255,0,0,255); // red
lineStyleBuilder = new LineStyleBuilder();
lineStyleBuilder.Color = new Color(0,0,0,255); // black
lineStyleBuilder.Width = 1.0f;
polygonStyleBuilder.LineStyle = lineStyleBuilder.BuildStyle();

// Define coordinates of outer ring
MapPosVector polygonPoses = new MapPosVector();
polygonPoses.Add(proj.FromWgs84(new MapPos(24.650930, 59.421659)));
polygonPoses.Add(proj.FromWgs84(new MapPos(24.657453, 59.416354)));
polygonPoses.Add(proj.FromWgs84(new MapPos(24.661187, 59.414607)));
polygonPoses.Add(proj.FromWgs84(new MapPos(24.667667, 59.418123)));
polygonPoses.Add(proj.FromWgs84(new MapPos(24.665736, 59.421703)));
polygonPoses.Add(proj.FromWgs84(new MapPos(24.661444, 59.421245)));
polygonPoses.Add(proj.FromWgs84(new MapPos(24.660199, 59.420677)));
polygonPoses.Add(proj.FromWgs84(new MapPos(24.656552, 59.420175)));
polygonPoses.Add(proj.FromWgs84(new MapPos(24.654010, 59.421472)));

// Create polygon holes poses, note that special MapPosVectorVector must be used
MapPosVectorVector polygonHoles = new MapPosVectorVector();
polygonHoles.Add(new MapPosVector());
polygonHoles[0].Add(proj.FromWgs84(new MapPos(24.658409, 59.420522)));
polygonHoles[0].Add(proj.FromWgs84(new MapPos(24.658409, 59.420522)));
polygonHoles[0].Add(proj.FromWgs84(new MapPos(24.662207, 59.418896)));
polygonHoles[0].Add(proj.FromWgs84(new MapPos(24.662207, 59.417411)));
polygonHoles[0].Add(proj.FromWgs84(new MapPos(24.659524, 59.417171)));
polygonHoles[0].Add(proj.FromWgs84(new MapPos(24.657615, 59.419834)));
polygonHoles.Add(new MapPosVector());
polygonHoles[1].Add(proj.FromWgs84(new MapPos(24.665640, 59.421243)));
polygonHoles[1].Add(proj.FromWgs84(new MapPos(24.668923, 59.419463)));
polygonHoles[1].Add(proj.FromWgs84(new MapPos(24.662893, 59.419365)));

// Add polygon
Polygon polygon = new Polygon(polygonPoses, polygonHoles, polygonStyleBuilder.BuildStyle());
polygon.SetMetaDataElement("ClickText", "Polygon");
vectorDataSource1.Add(polygon);

5. Add a Text
Text style parameters are similar to Marker, as both are Billboards, i.e. objects which have two special features:
- Overlapping can be prohibited, based which one is nearer and explicit priority paramteter
- These can be shown as billboards in 2.5D (tilted) view. Set OrientationMode for this. There are 3 options: show on ground, and rotate with map (like street names), show on ground (do not rotate with map), or show as billboard (no rotation). See image below for the options.
    // 1. Create text style
    NTTextStyleBuilder* textStyleBuilder = [[NTTextStyleBuilder alloc] init];
    [textStyleBuilder setColor:[[NTColor alloc] initWithColor:0xFFFF0000]];
    [textStyleBuilder setOrientationMode:NT_BILLBOARD_ORIENTATION_FACE_CAMERA];
      // setScaleWithDPI enables higher resolution texts for retina devices but consumes more memory and is slower if you have many texts on map
    [textStyleBuilder setScaleWithDPI:false];

    // 2. Define text location and add to datasource
    pos = [proj fromWgs84:[[NTMapPos alloc] initWithX:24.653302 y:59.422269]];
    NTText* text1 = [[NTText alloc] initWithPos:pos
                                          style:[textStyleBuilder buildStyle]
                                           text:@"Face camera text"];
    [text1 setMetaDataElement:@"ClickText" element:@"Text 1"];
    [vectorDataSource1 add:text1];
// Create text style
TextStyleBuilder textStyleBuilder = new TextStyleBuilder();
textStyleBuilder.setColor(new Color(0xFFFF0000));
textStyleBuilder.setOrientationMode(BillboardOrientation.BILLBOARD_ORIENTATION_FACE_CAMERA);

// This enables higher resolution texts for retina devices, but consumes more memory and is slower
textStyleBuilder.setScaleWithDPI(false);

// Add text
Text textpopup1 = new Text(proj.fromWgs84(new MapPos(24.653302, 59.422269)),
                                              textStyleBuilder.buildStyle(),
                                              "Face camera text");
textpopup1.setMetaDataElement("ClickText", "Text nr 1");
vectorDataSource1.add(textpopup1);
// Create text style
var textStyleBuilder = new TextStyleBuilder();
textStyleBuilder.Color = new Color(255, 0, 0, 255);
textStyleBuilder.OrientationMode = BillboardOrientation.BillboardOrientationFaceCamera;

// This enables higher resolution texts for retina devices, but consumes more memory and is slower
textStyleBuilder.ScaleWithDPI = false;

// Add text
var textpopup1 = new Text(proj.FromWgs84(new MapPos(24.653302, 59.422269)),
    textStyleBuilder.BuildStyle(),
    "Face camera text");
textpopup1.SetMetaDataElement("ClickText", "Text nr 1");
vectorDataSource1.Add(textpopup1);

6. Add a BalloonPopup
BalloonPopup is usually opened based on click event of an object, but you can just directly add them also. Following BalloonPopup has several special styling elements, like (i) image as "Left Image", arrow image as "Right Image" and tuned radius values to look nicer.
To use the same styling elements you have to copy the png files (info.png and arrow.png) from sample app projects to your app.
    // 1. Load styling bitmaps to show on the popups
    UIImage* infoImage = [UIImage imageNamed:@"info.png"];
    UIImage* arrowImage = [UIImage imageNamed:@"arrow.png"];

    // 2. Create style for the BalloonPopup
    NTBalloonPopupStyleBuilder* balloonPopupStyleBuilder = [[NTBalloonPopupStyleBuilder alloc] init];
    [balloonPopupStyleBuilder setCornerRadius:20];
    [balloonPopupStyleBuilder setLeftMargins:[[NTBalloonPopupMargins alloc] initWithLeft:6 top:6 right:6 bottom:6]];
    [balloonPopupStyleBuilder setLeftImage:infoImage];
    [balloonPopupStyleBuilder setRightImage:arrowImage];
    [balloonPopupStyleBuilder setRightMargins:[[NTBalloonPopupMargins alloc] initWithLeft:2 top:6 right:12 bottom:6]];
      // higher priority ensures that baloon is visible when overlaps with other billboards
    [balloonPopupStyleBuilder setPlacementPriority:1];

    // 3. define location
    pos = [proj fromWgs84:[[NTMapPos alloc] initWithX:24.655662 y:59.425521]];

    // 4. create BalloonPopup and add to datasource
    NTBalloonPopup* popup1 = [[NTBalloonPopup alloc] initWithPos:pos
                                                           style:[balloonPopupStyleBuilder buildStyle]
                                                           title:@"Popup with pos"
                                                            desc:@"Images, round"];
    [popup1 setMetaDataElement:@"ClickText" element:@"Popupcaption nr 1"];
    [vectorDataSource1 add:popup1];
// Load bitmaps to show on the label
Bitmap infoImage = BitmapFactory.decodeResource(getResources(), R.drawable.info);
Bitmap arrowImage = BitmapFactory.decodeResource(getResources(), R.drawable.arrow);

// Add popup
BalloonPopupStyleBuilder balloonPopupStyleBuilder = new BalloonPopupStyleBuilder();
balloonPopupStyleBuilder.setCornerRadius(20);
balloonPopupStyleBuilder.setLeftMargins(new BalloonPopupMargins(6, 6, 6, 6));
balloonPopupStyleBuilder.setLeftImage(BitmapUtils.createBitmapFromAndroidBitmap(infoImage));
balloonPopupStyleBuilder.setRightImage(BitmapUtils.createBitmapFromAndroidBitmap(arrowImage));
balloonPopupStyleBuilder.setRightMargins(new BalloonPopupMargins(2, 6, 12, 6));
balloonPopupStyleBuilder.setPlacementPriority(1);
BalloonPopup popup1 = new BalloonPopup(proj.fromWgs84(new MapPos(24.655662, 59.425521)),
                                       balloonPopupStyleBuilder.buildStyle(),
                                       "Popup with pos",
                                       "Images, round");
popup1.setMetaDataElement("ClickText", "popupcaption nr 1");
vectorDataSource1.add(popup1);
// Add popup, but instead of giving it a position attach it to a marker
balloonPopupStyleBuilder = new BalloonPopupStyleBuilder();
balloonPopupStyleBuilder.setColor(new Color(0xFF000000));
balloonPopupStyleBuilder.setCornerRadius(0);
balloonPopupStyleBuilder.setTitleColor(new Color(0xFFFFFFFF));
balloonPopupStyleBuilder.setTitleFontName("HelveticaNeue-Medium");
balloonPopupStyleBuilder.setDescriptionColor(new Color(0xFFFFFFFF));
balloonPopupStyleBuilder.setDescriptionFontName("HelveticaNeue-Medium");
balloonPopupStyleBuilder.setStrokeColor(new Color(0xFF00B483));
balloonPopupStyleBuilder.setStrokeWidth(0);
balloonPopupStyleBuilder.setPlacementPriority(1);
BalloonPopup popup2 = new BalloonPopup(marker1, balloonPopupStyleBuilder.buildStyle(),
                                       "Popup attached to marker", "Black, rectangle.");
popup2.setMetaDataElement("ClickText", "Popupcaption nr 2");
vectorDataSource1.add(popup2);
// Add popup
balloonPopupStyleBuilder = new BalloonPopupStyleBuilder();
balloonPopupStyleBuilder.setDescriptionWrap(false);
balloonPopupStyleBuilder.setPlacementPriority(1);
BalloonPopup popup3 = new BalloonPopup(proj.fromWgs84(new MapPos(24.658662, 59.432521)),
                                       balloonPopupStyleBuilder.buildStyle(),
                                       "This title will be wrapped if there's not enough space on the screen.",
                                       "Description is set to be truncated with three dots, unless the screen is really really big.");
popup3.setMetaDataElement("ClickText", "Popupcaption nr 3");
vectorDataSource1.add(popup3);
// Create balloon popup
var infoBitmap = new Bitmap (AssetUtils.LoadBytes("info.png"), true);
var arrowBitmap = new Bitmap (AssetUtils.LoadBytes("arrow.png"), true);

var balloonPopupStyleBuilder = new BalloonPopupStyleBuilder();
balloonPopupStyleBuilder.LeftImage = infoBitmap;
balloonPopupStyleBuilder.RightImage = arrowBitmap;
balloonPopupStyleBuilder.LeftMargins = new BalloonPopupMargins (6, 6, 6, 6);
balloonPopupStyleBuilder.RightMargins = new BalloonPopupMargins (2, 6, 12, 6);
balloonPopupStyleBuilder.CornerRadius = 20;
balloonPopupStyleBuilder.TitleFontName = "Helvetica";
balloonPopupStyleBuilder.TitleFontSize = 16;
balloonPopupStyleBuilder.TitleColor = new Color(200, 0, 0,255);
balloonPopupStyleBuilder.StrokeColor = new Color(200, 120, 0, 255);
balloonPopupStyleBuilder.StrokeWidth = 1;
balloonPopupStyleBuilder.PlacementPriority = 1;
var popup = new BalloonPopup(
    proj.FromWgs84(new MapPos(0, 20)),
    balloonPopupStyleBuilder.BuildStyle(),
    "Popup Title", "Description");
dataSource.Add(popup);

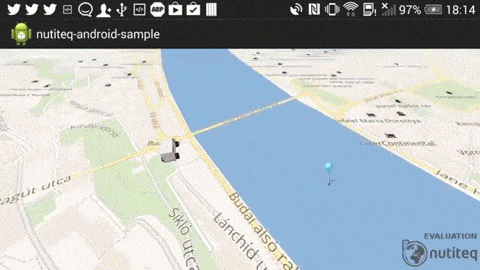
6. Add 3D model objects
One special feature of Nutiteq Maps SDK is that you can add 3D objects (models) to map. For example you can add small moving car or other decorative or informative elements.
3D objects are added to same LocalVectorDataSource as 2D objects. The only special requirement is that it has to be in special Nutiteq Markup Language (NML) format. As name tells, it is specific to Nutiteq SDK, and it is mobile-optimised (multi-resolution) 3D file format.
First you need a NML file. You can get some free samples from here. If you have own model as Collada DAE (or KMZ) format, then you would need Nutiteq 3D converter tools to convert it to NML, so it can be used in mobile. Please ask [email protected] for more info about it.
Typical NML files are quite small (below 100K), if they are large then they are probably too slow to render anyway, so consider using lower detail models. Then you can add it to res/raw folder on Android app, or any resource folder in iOS project.
Finally load the model in code, and add to map
// load NML file model from a file
NTUnsignedCharVector* modelData = [NTAssetUtils loadBytes:@"fcd_auto.nml"];

// set location for model, and create NMLModel object with this
NTMapPos* pos = [proj fromWgs84:[[NTMapPos alloc] initWithX:24.646469 y:59.424939]];
NTNMLModel* model = [[NTNMLModel alloc] initWithPos:pos sourceModelData:modelData];

 // add metadata for click handling (optional)
[model setMetaDataElement:@"ClickText" element:@"My nice car"];

// oversize it 20*, just to make it more visible (optional)
[model setScale:20];

// finally add it to normal datasource
[vectorDataSource add:model];
// load NML file model from a file
UnsignedCharVector modelFile = AssetUtils.loadBytes("fcd_auto.nml");

// set location for model, and create NMLModel object with this
MapPos modelPos = baseProjection.fromWgs84(new MapPos(24.646469, 59.423939));
NMLModel model = new NMLModel(modelPos, modelFile);

// oversize it 20*, just to make it more visible (optional)
model.setScale(20);

 // add metadata for click handling (optional)
model.setMetaDataElement("ClickText", "Single model");

// add it to normal datasource
vectorDataSource.add(model);
// load NML file model from a file
var modelFile = AssetUtils.LoadBytes("fcd_auto.nml");

// set location for model, and create NMLModel object with this
var modelPos = proj.FromWgs84(new MapPos(24.646469, 59.423939));
var model = new NMLModel(modelPos, modelFile);

// oversize it 20*, just to make it more visible (optional)
model.Scale = 20;

// add metadata for click handling (optional)
model.SetMetaDataElement("ClickText", "Single model");

// add it to normal datasource
dataSource.Add(model);
Performance tuning of LocalVectorDataSource
LocalVectorDataSource has additional creation option spatialIndexType which enables to define spatial index to the datasource. By default there is no spatial index. Our suggestion:
- Use no spatial index (default option) if number of elements is small, below ~1000 points or markers (less if you have complex lines and polygons)
- Use KDTREESPATIALINDEX as index type for bigger number of elements.
Advantage of the index is that CPU usage decreases a lot for large number of objects and you will have smoother map interaction (pan and zoom). But the downside is that showing overlay is slightly delayed: using index is not done immediately when you move the map, but after some hundred milliseconds.
Overall maximum number of objects on map is in any case limited to the RAM available for the app. System gives several hundred MB for iOS app, and more like tens of MB for Android app, but it depends a lot on device and app settings, also on data density. So we suggest to test with your target devices and full dataset.
// Initialize a local vector data source with spatial index
  NTLocalVectorDataSource* vectorDataSource1 =
    [[NTLocalVectorDataSource alloc] initWithProjection:proj
        spatialIndexType: NTLocalSpatialIndexType::NT_KDTREE_SPATIAL_INDEX];
LocalVectorDataSource vectorDataSource2 = new LocalVectorDataSource(proj, LocalSpatialIndexType.KDTREE_SPATIAL_INDEX);
var vectorDataSource1 = new LocalVectorDataSource(proj, LocalSpatialIndexType.KdtreeSpatialIndex);
Another special case is if you have very complex lines or polygons: objects with high number of vertexes. By high number I mean more than hundreds of points per object. Typical example would be GPS traces for long periods of time, recording a point every second or so. Indexing does not help here much, as you would want to show whole track on screen. Here LocalVectorDataSource provides automatic line simplification feature, which reduces number of polygon and line points while trying to keep the shape of the object similar to original. By automatic simpification we mean zoom-dependent re-simplification: when map is zoomed out, more aggressive simplification is used as you will not notice it, and when you zoom in, then less simplification is applied, until in fill zoom in you see original details.
There are several ways how to simplify geometries, currently Nutiteq SDK has one method implemented for lines and polygons: the most common Ramer-Douglas-Peucker algorithm. To be exact, simplification is done in two passes - first pass uses fast Radial Distance vertex rejection, second pass uses Ramer-Douglas-Peuckerworst algorithm (with worst case quadratic complexity). All this is can be used with just one line of code - in following example (under iOS) for minimal 1-pixel simplification, where result should be invisible but effect can be significant, depending on your source data:
// tolerance parameter: max error in pixels has to divided by view width
[vectorDataSource1 setGeometrySimplifier:
  [[NTDouglasPeuckerGeometrySimplifier alloc] initWithTolerance: 1.0f / 320.0f]];
vectorDataSource1.setGeometrySimplifier(new DouglasPeuckerGeometrySimplifier( 1.0f / 320.0f));
vectorDataSource1.GeometrySimplifier = new DouglasPeuckerGeometrySimplifier( 1.0f / 320.0f);
The simplification makes rendering (GPU tasks) faster with the cost of some additional computation (CPU), and for aggressive simplification you can see reducement of line quality. So use it carefully, only when you need it.